Senifone S1 Manual
Welcome
Thank you for choosing the Senifone S1 smartphone.
To get started, keep the following items ready:
- A charged Senifone S1
- The included SIM tool
- Your Wi-Fi password
- Your Google account credentials (optional)
Symbols used in this manual
This manual uses the following symbols and gestures:
- Step order: Follow the steps in order.
- Single step: A single numbered action.
- Tap or press and hold: Tap briefly or press and hold on the screen.
- Swipe down: Swipe vertically toward the bottom of the screen.
- Swipe sideways: Swipe horizontally left or right.
Package contents
The package includes:
- Senifone S1 smartphone
- Power adapter
- USB cable
- SIM tool
- Printed manual
SIM card and storage
Senifone S1 supports dual SIM (two SIM cards) and a microSD card for additional storage.
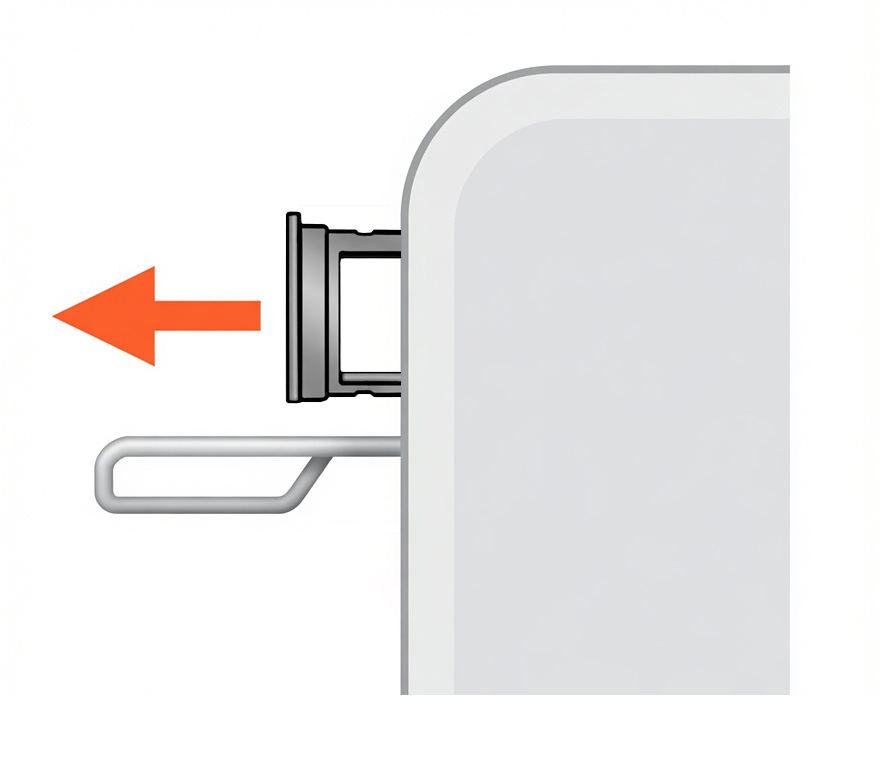
Open the SIM tray
- Insert the SIM tool into the tray hole.
- Push gently until the tray pops out slightly.
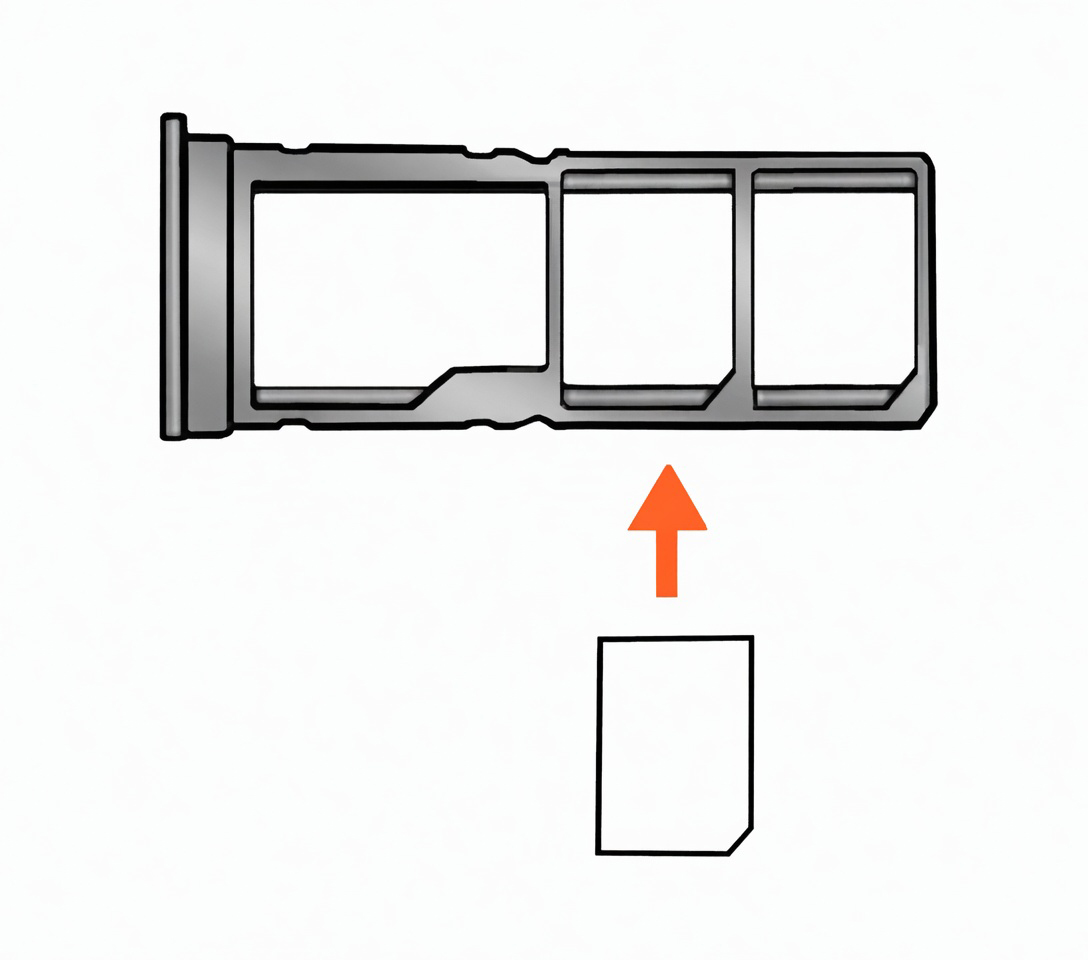
Insert SIM and storage cards
- Place the SIM and microSD cards in the tray as shown.
- Ensure the cards are aligned correctly.
- Slide the tray back into the phone until fully inserted.
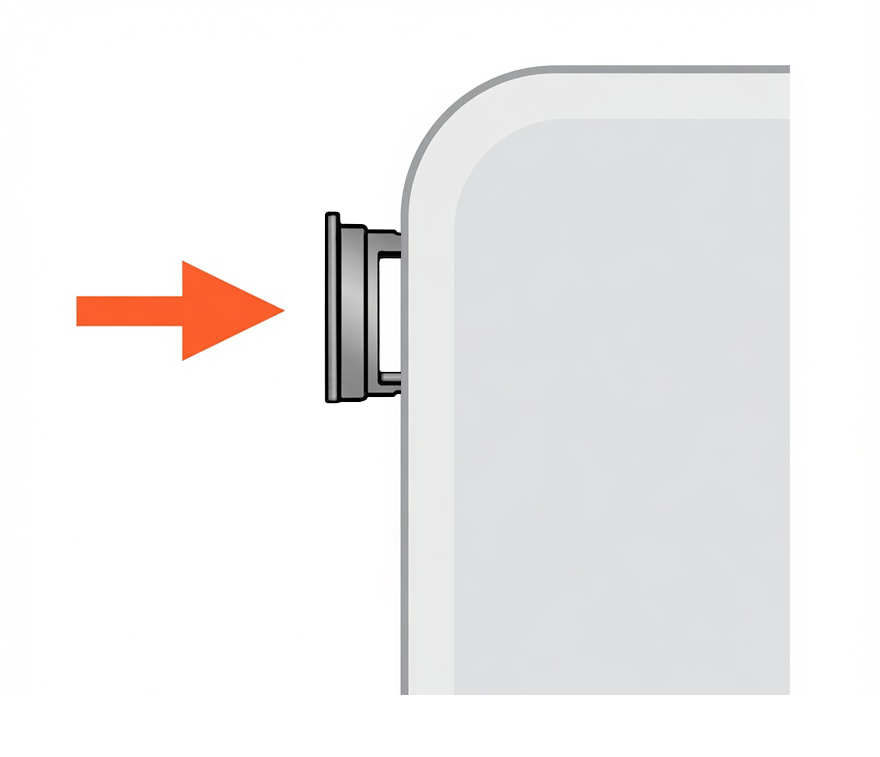
Reinsert the SIM tray
- Slide the SIM tray back into the device.
- Make sure the tray is fully inserted and store the SIM tool safely.
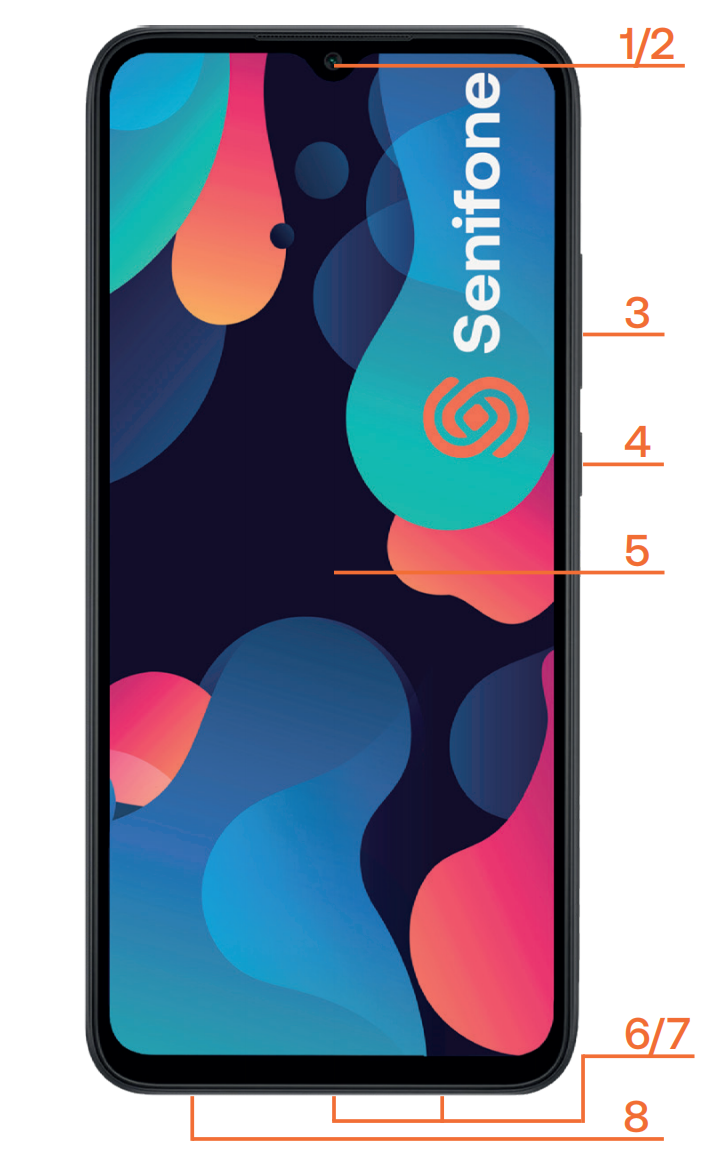
Device overview
Front of the device
-
Camera
-
Earpiece speaker
-
Volume control
-
On/off button
-
Display
-
Charging port
-
Speaker
-
Microphone
Top and side details
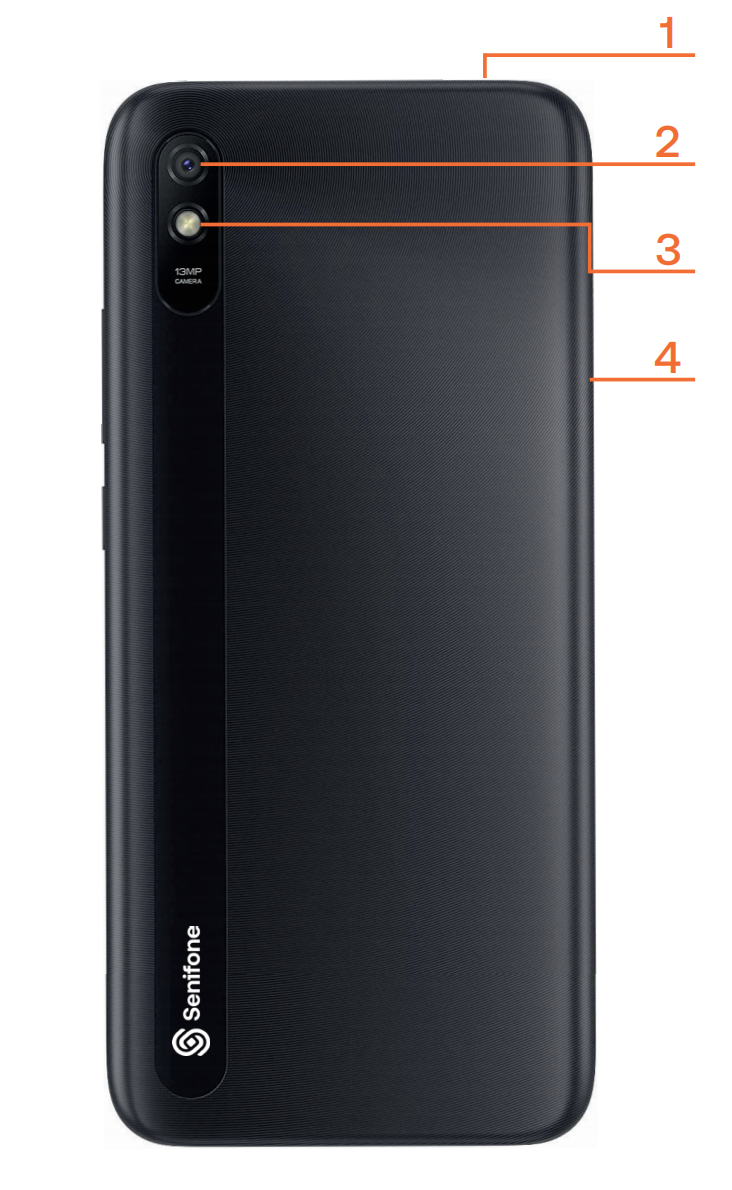
-
Headphone jack
-
Main camera
-
Flash
-
SIM and storage card tray
Home screen callouts
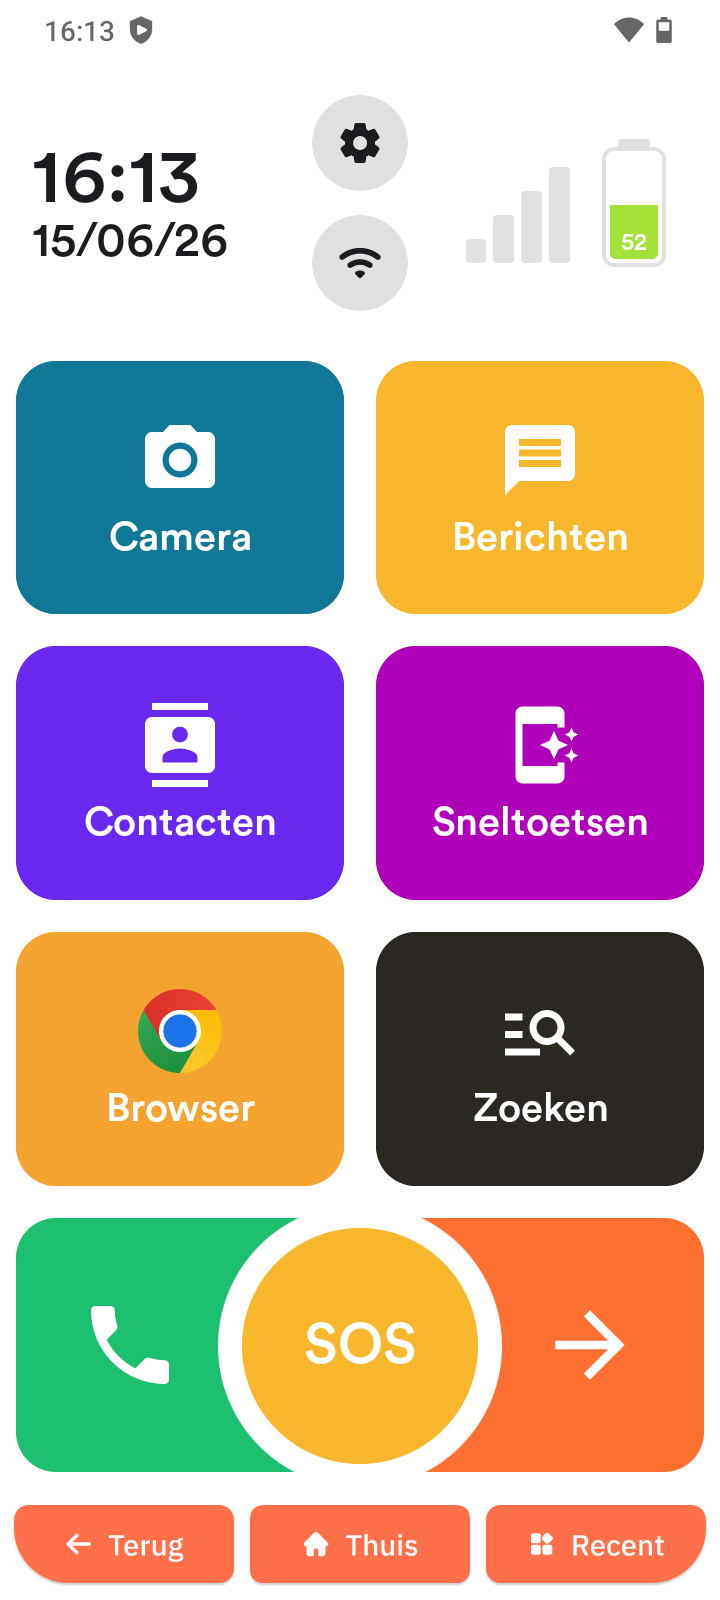
This example shows the default home screen layout with app tiles, the SOS button, and navigation buttons at the bottom.